


Java is widely used programming language to develop Web applications , Games , Standalone Applications , Mobile applications, etc.This has been Developed by Sun Microsystems (now owned by Oracle Corporation), Java was first released in 1995 and has since become a fundamental technology in the world of software development.Java programs are compiled into bytecode, which can run on any platform with a Java Virtual Machine (JVM), making it highly accessible and adaptable across various operating systems.Java offers a rich set of libraries and frameworks, making it suitable for a wide range of applications, from web development and mobile apps to enterprise-level systems.
Every Software has minimum Hardware and Software to functions smoothly and perform seamlessly in our environments. Similarly, Java has same requirements. The following hardware and software requirements are required for Java 8 and above versions for being compatible with windows operation systems.
Various versions of windows supports for Java.
To successfully install Java on the Windows Operating System, you must allocate at least 124 MB of space for the Java Runtime Environment (JRE) and reserve a minimum of 2 MB of hard disk drive (HDD) space.
For a Java installation on the Windows Operating System, we need to allocate, minimum of 128 MB of RAM space available.
The Java Development Kit (JDK) is an important environment setup used in the deployment of Java applications. It encompasses a comprehensive set of essential tools crucial for Java development, including an interpreter, predefined JAR files, and a document generator.
The choice of JDK version is critical, as different tasks and frameworks may require specific JDK versions for compatibility. For instance, the Hadoop Framework is best suited for JDK 8. Therefore, developers must ensure they use the appropriate JDK version that aligns with the requirements of their development framework to ensure seamless and efficient Java application development.
Here is a list of different JDK versions:
Starting with JDK 11, Oracle, the owner of Java, started offering JDK in two different forms:
Oracle JDK (Paid Version) for commercial use.
Oracle OpenJDK for free.
At this point, we have gained an understanding of what exactly JDK is, including its various versions.The next step in the Java installation process on Windows is to acquire the appropriate JDK and install it.
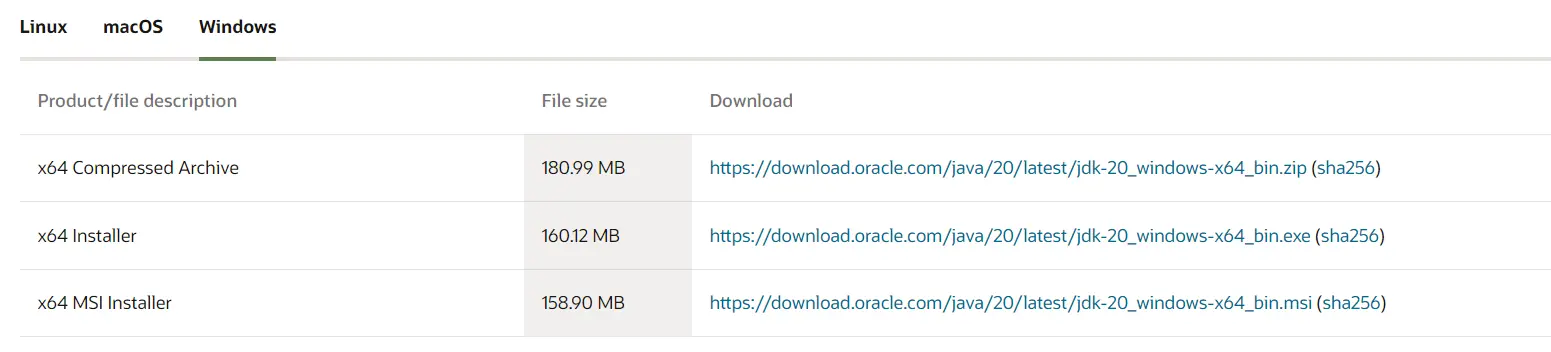
The first step in downloading the JDK. To download JDK,visit the official website and select the JDK version compatible with Windows 64-bit operating system, as shown below. Once the download is complete, execute the .exe file to install the Java Development Kit (JDK) onto your system.
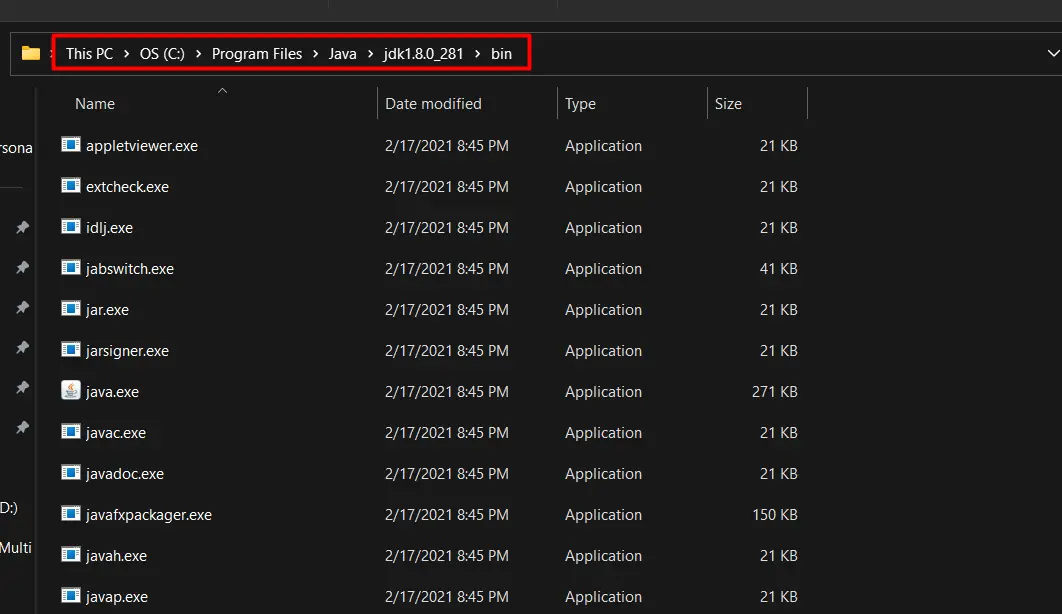
After installing JDK you want to set the Java path.Open the folder and enter the bin file, and copy the bin file location as shown below.
Having copied the bin file location, you are now ready to configure the Java environment on your Windows operating system.
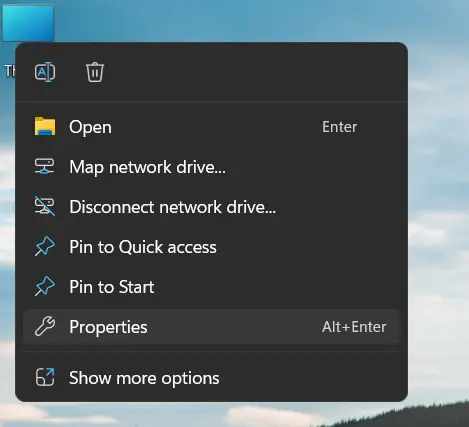
To do this, navigate to your desktop, right-click on the 'This PC' icon, and then choose 'Properties,' as mentioned below.
Once you click on 'Properties,' you'll redirect to the system information window, which provides a detailed overview of your computer's hardware specifications and operating system information.
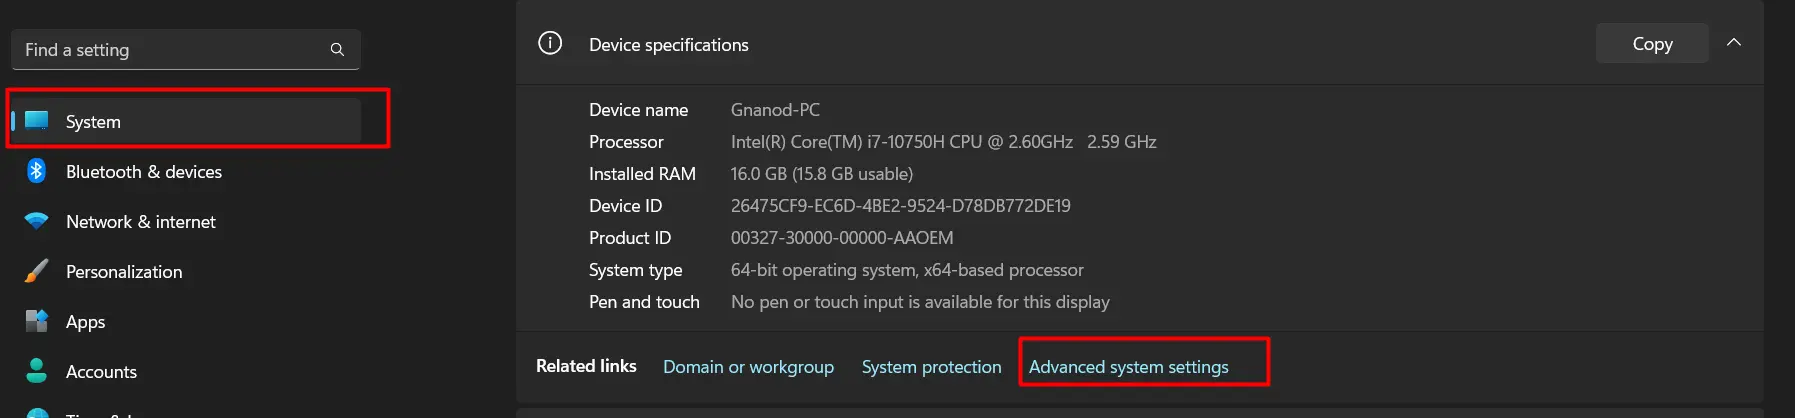
Next, please select the Advanced system settings option. Then you will redirect to the System Properties window, as displayed below.
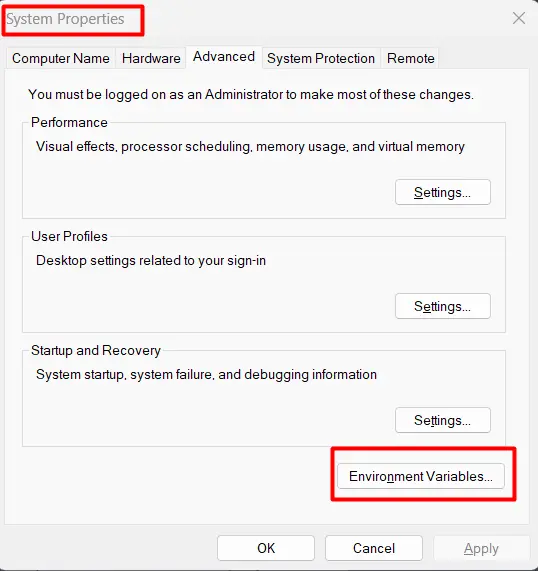
Once you click 'Environment variables' section, you will be redirected to the following window, where you can configure the JAVA_HOME and JAVA_PATH variables.
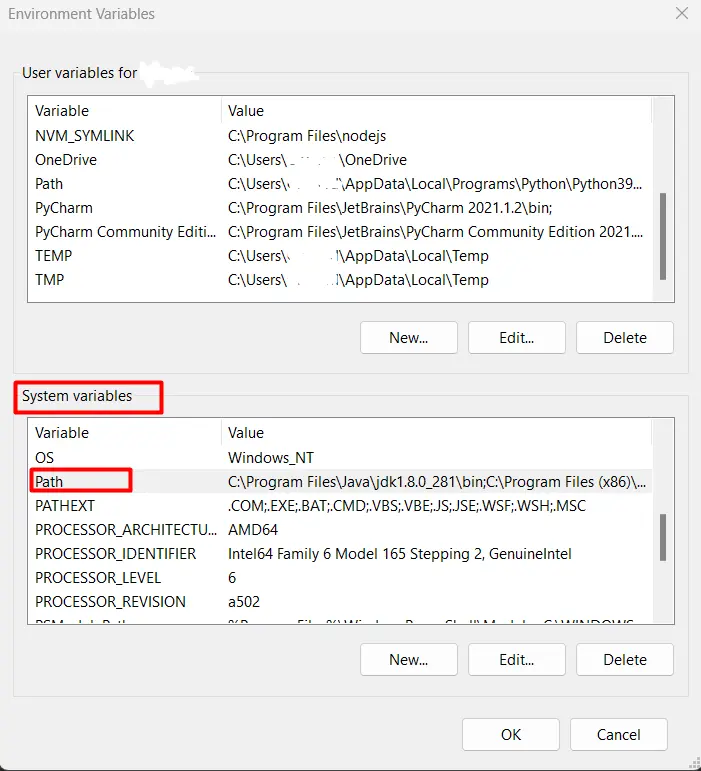
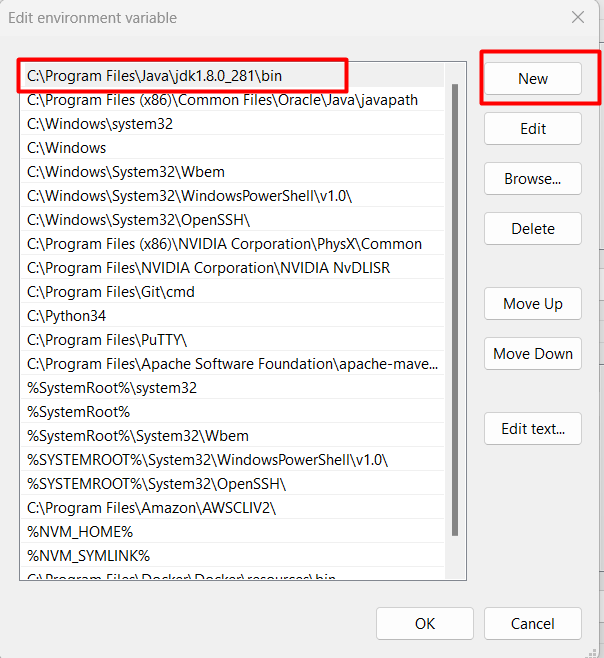
Now you can see the System Variables option in the bottom dialog box.In here Select the Path from the Environment variables and then click Edit Button.Once you select the edit option, you will redirect to the new window, where we need to select New and configure Java path. Then Click Ok button.
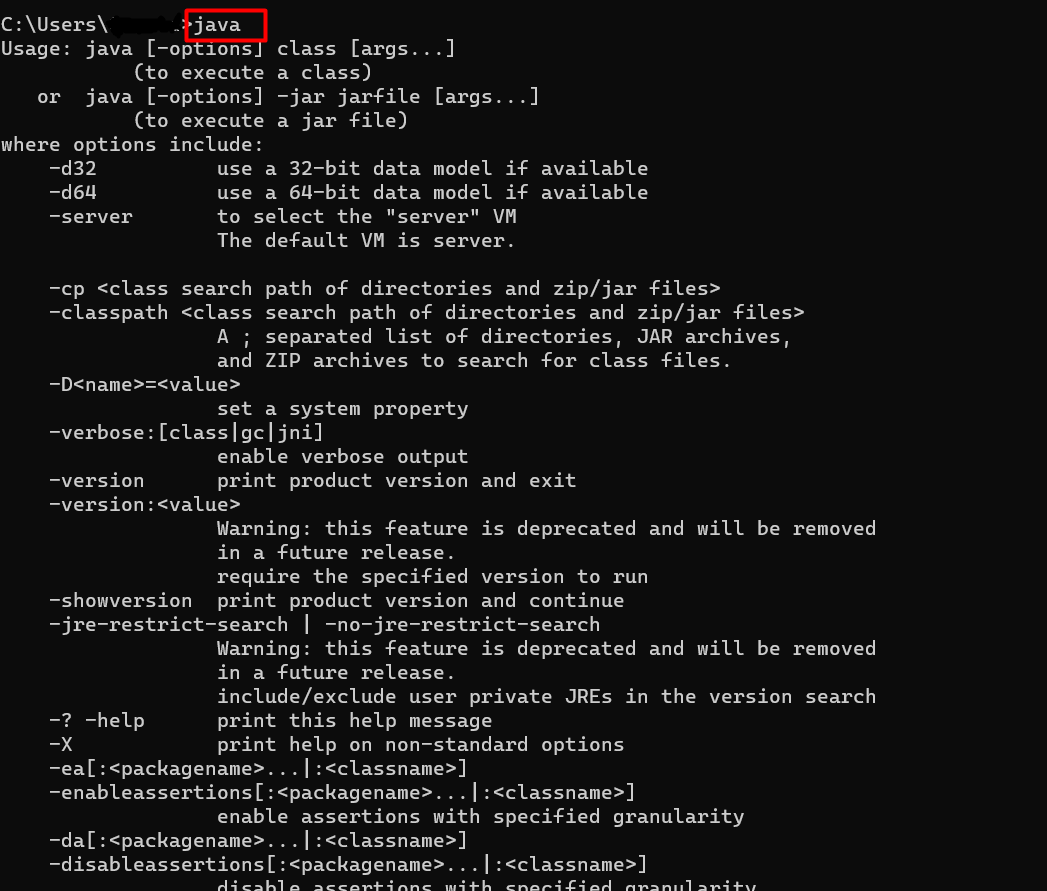
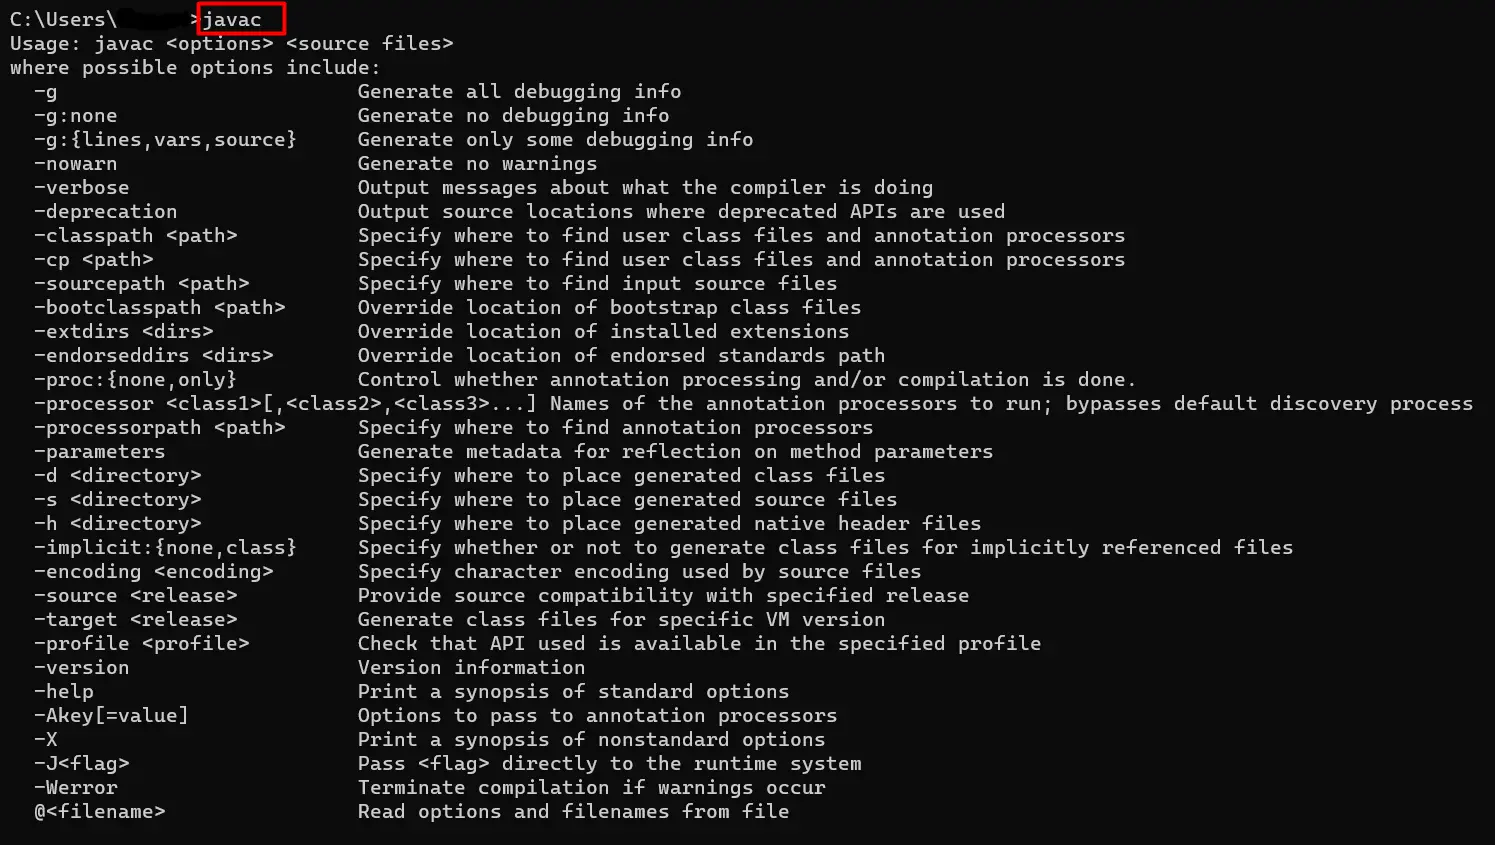
Launch a new Command Prompt (CMD) window and enter the commands java and javac. Verify if the following output is displayed in the Command Prompt window.
© 2024 CodeCafeX ,Inc. All Rights Reserved


